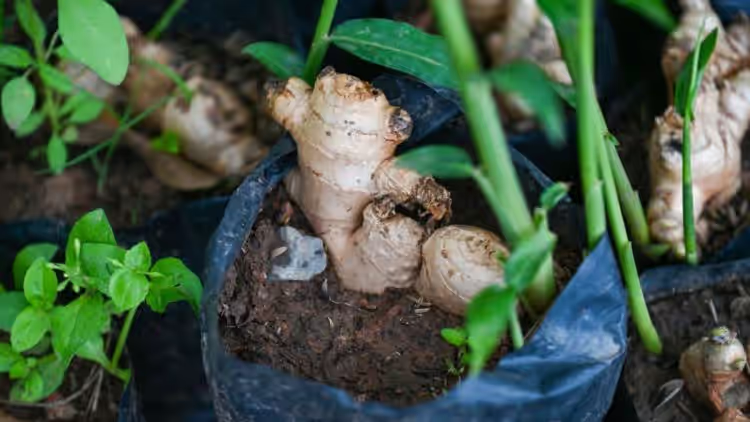
Regrowing vegetables at home is a growing trend, and ginger is one of the easiest plants to cultivate in a pot! With just a little patience, you can have your own fresh, organic ginger ready for harvesting. Here’s everything you need to know!
🌿 Why Grow Your Own Ginger?

Ginger is an incredibly versatile ingredient used in teas, stews, baked goods, and even sushi marinades. Beyond its bold, spicy flavor, ginger is packed with essential nutrients like:
✔️ Vitamin C
✔️ Magnesium
✔️ Iron
✔️ Calcium
For centuries, traditional Asian medicine has used ginger to:
✔️ Relieve headaches
✔️ Soothe cold symptoms 🤧
✔️ Aid digestion
✔️ Boost metabolism and support weight loss
The problem? Most store-bought ginger travels long distances before reaching your kitchen. Growing your own ginger at home is fresh, sustainable, and cost-effective—plus, it grows right on your windowsill!
🌱 When to Start Growing Ginger?
The best time to start growing ginger is in warm, bright weather, as it thrives in indoor conditions. However, it takes several months to mature, so it’s best to plant in spring or summer to harvest by fall or winter—just in time for a warming cup of ginger tea! ☕
🛠️ What You Need to Grow Ginger
Growing ginger requires minimal supplies:
✔️ Fresh organic ginger with buds (“eyes”)
✔️ Sharp knife
✔️ Bowl of water
✔️ Planting pots:
- A 4-liter pot for starting
- A 15-20 liter pot for repotting
✔️ Nutrient-rich soil
✔️ Glass or cling film (optional)
💡 Tip: Always choose organic ginger to ensure it’s free from growth inhibitors that prevent sprouting.
🌿 Step-by-Step Guide to Growing Ginger
1️⃣ Choose a ginger piece with visible buds (eyes)—this is where new shoots will grow.
2️⃣ Using a sharp knife, cut the ginger into 2-inch pieces, making sure each piece has at least one bud.
3️⃣ Soak the pieces in water for 24 hours to speed up germination.
4️⃣ Fill a small pot two-thirds full with nutrient-rich soil.
5️⃣ Place the ginger pieces in the soil with the buds facing upward (2-3 pieces per pot).
6️⃣ Cover them with about 2 cm of soil—don’t bury them too deep!
7️⃣ Water lightly until the soil is moist but not wet (too much water can cause rotting).
8️⃣ Place the pot in a warm, bright spot, but avoid direct sunlight. A windowsill above a heater is perfect!
9️⃣ Create a mini greenhouse for faster germination:
- Place a large glass upside down over the pot.
- OR cover the pot with cling film secured with a rubber band.
- Remove once the first green shoots appear.
🌿 Repotting & Care
✔️ Once a green shoot appears, transfer it to a larger 15-20L pot.
✔️ Keep the soil moist but avoid stagnant water—ginger hates waterlogged roots!
✔️ Use a spray bottle to mist the soil daily with low-calcium rainwater (if available).
✔️ Ginger plants can grow up to 1 meter tall, resembling bamboo! 🎋
🌱 When & How to Harvest Ginger?
After 7-10 months, your ginger will be ready for harvest. Here’s how to know when it’s time:
✔️ The leaves will turn yellow and wilt.
✔️ Stop watering as soon as the leaves begin to yellow.
✔️ Carefully dig up the ginger—you’ll find a large root with new pieces!
🎉 That’s it! Clean off the soil, wash it, and enjoy your fresh homegrown ginger in teas, soups, or desserts! 🍵
🔄 Regrowing Ginger (Endless Supply!)
💡 Bonus Tip: Don’t throw away all your ginger! Regrowing works indefinitely! Simply take a piece of your harvested ginger and repeat the process.
Would you try growing ginger at home? Let us know! 🌱😊


