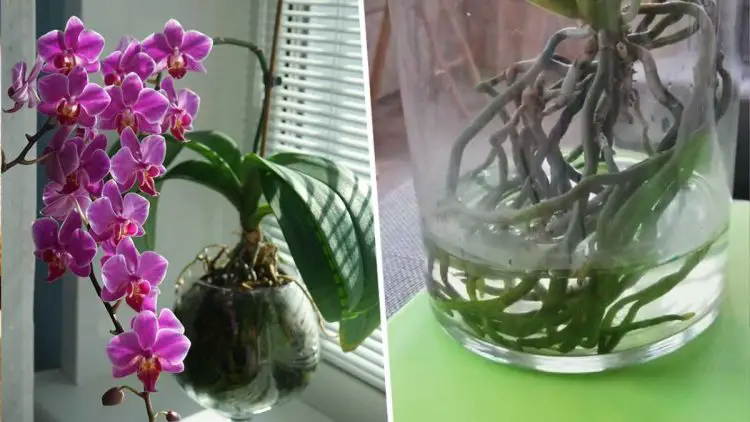
Orchids are some of the most fascinating and admired plants, prized for their stunning beauty and wide variety. Traditionally, orchids have been grown in soil, requiring specific care in terms of watering and soil management. However, a new and innovative method has gained popularity: growing orchids in water-filled pots. This method offers a number of advantages that can help orchids thrive longer and bloom more effectively.
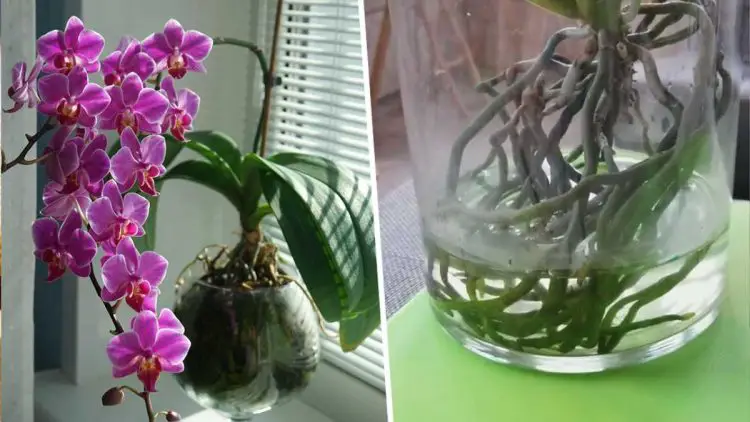
Here’s everything you need to know about how to grow your orchids in water and enjoy lush, healthy plants.
Why Grow Orchids in Water?
Growing orchids in water-filled pots provides several benefits that make them easier to care for and help them thrive:
- Less Frequent Watering: Orchids grown in water pots draw moisture directly from the water, reducing the need for frequent watering. This makes it easier to maintain the right moisture level for the plant.
- Humidity Control: The water surrounding the roots creates a humid environment, which is ideal for many orchid species. This encourages healthy growth and can promote more vibrant blooms.
- Reduced Risk of Disease: Growing orchids without soil can help minimize the risk of soil-borne diseases such as root rot and fungal infections, keeping your plants healthier.
How to Grow Orchids in Water-Filled Pots
If you’re interested in this approach, follow these steps to ensure your orchids thrive in their new water-based environment:
- Choose the Right Species
Not all orchids are suited for growing in water pots. Epiphytic orchids such as Phalaenopsis, Vanda, and Dendrobium are ideal candidates for this method. These species naturally grow on trees or rocks, making them well-adapted to life without soil. - Prepare the Pot
Choose a transparent or semi-transparent pot to easily monitor the water level and check the roots. Fill the pot with demineralized water or rainwater to avoid the buildup of harmful minerals. - Place the Roots in Water
Gently place the orchid’s roots into the pot of water, ensuring they are completely submerged but not drowned. The roots should have contact with the water, but care must be taken to prevent them from sitting in stagnant water for too long. - Provide Ample Light
Place the orchid in a location that receives ample indirect light. Orchids need light for photosynthesis and healthy growth, but direct sunlight can scorch the leaves. - Monitor the Water Level
Regularly check the water level and add fresh water as needed to maintain a consistent amount. Orchids can thrive when the water level is stable, but sudden fluctuations can cause stress. - Fertilize Regularly
Every 2 to 4 weeks, add a water-soluble fertilizer to the water to provide essential nutrients. Follow the product’s instructions carefully to avoid over-fertilizing, which can harm the plant. - Periodic Replanting
Occasionally, you may need to replant your orchid in fresh water. This helps prevent the buildup of minerals or unwanted substances in the pot, ensuring a healthy environment for your orchid’s roots.
Things to Consider
While growing orchids in water-filled pots can be an exciting and effective method, it does require some attention to detail. Not all orchids are suited to this method, so it’s important to research the species before committing to water-based cultivation.
Although growing orchids in water has its many benefits, it is important to carefully monitor the health of the plant and make adjustments as needed to ensure it continues to thrive.
By following these tips, you can enjoy vibrant, healthy orchids that bloom for longer and stay beautiful in their water-filled home. 🌸