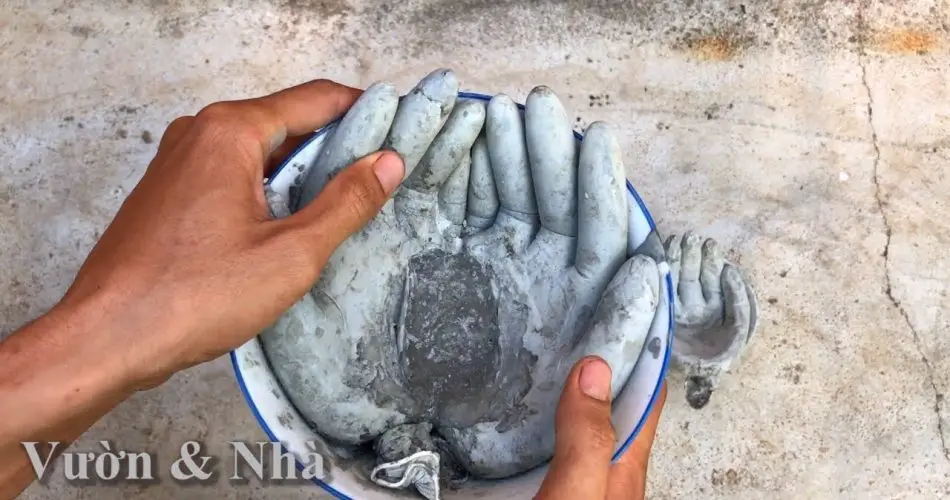
Creating a hand-shaped flower pot is a fun and creative project. Here’s how you can make your own:
Materials Needed:
- Gloves (rubber or latex)
- Cement or plaster
- Water
- Container for mixing
- Plants or flowers
Steps:
- Prepare the Gloves: Choose sturdy rubber or latex gloves. These will form the mold for your hand-shaped pot.
- Mix the Cement or Plaster: In a container, mix the cement or plaster with water according to the instructions on the package. The mixture should be smooth and thick.
- Fill the Gloves: Carefully fill the gloves with the cement or plaster mixture. Make sure to fill each finger completely to get the hand shape right.
- Shape and Position: Position the gloves in the shape you want. You can place them on a flat surface with fingers spread or bend them to create a cupped hand shape. Use supports if needed to hold the shape.
- Let It Set: Allow the mixture to set and harden inside the gloves. This can take several hours or overnight, depending on the material used.
- Remove the Gloves: Once the cement or plaster is fully set, gently peel away the gloves. Be careful not to damage the hand shape.
- Add Plants: Fill the hand-shaped pot with soil and plant your favorite flowers or small plants. Make sure to choose plants that fit well in the space.
Tips:
- Decorate: Paint or decorate your hand-shaped pot to give it a unique look.
- Drainage: If needed, drill small holes in the palm area for drainage.
- Indoor/Outdoor: These pots can be used both indoors and outdoors.
Making a hand-shaped flower pot is a great way to add a personal touch to your gardening. It’s an enjoyable project that results in a unique and eye-catching planter!
Show Comments