Orchid Innovation: Crafting DIY Orchid Pots from Plastic Bottles
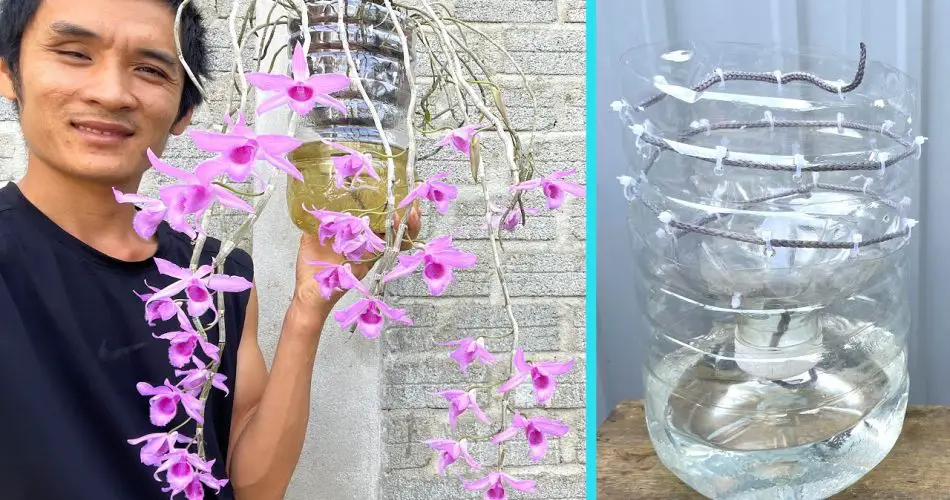
Orchid enthusiasts often seek creative and sustainable ways to showcase these elegant blooms. One inventive solution is crafting DIY orchid pots from plastic bottles. This not only offers an eco-friendly approach but also allows for personalized and budget-friendly orchid containers. In this article, we explore the steps to make orchid pots with plastic bottles, adding a touch of ingenuity to your orchid care routine.
How to Make Orchid Pots with Plastic Bottles:
- Gathering Materials: Collect the materials needed for crafting DIY orchid pots. This includes plastic bottles (preferably large ones with sturdy bases), a pair of scissors or a utility knife, a marker for tracing, and any decorative elements you wish to incorporate.
- Preparing the Plastic Bottles: Start by removing labels and thoroughly cleaning the plastic bottles. Ensure they are dry before proceeding. For larger orchids or those with extensive root systems, consider using larger plastic bottles.
- Determining Pot Size: Orchids thrive in pots that allow for proper drainage and aeration. With a marker, determine the desired height for the orchid pot. Cut the plastic bottle at the marked line, keeping in mind that orchids prefer pots with sufficient depth.
- Creating Drainage Holes: Orchids dislike waterlogged conditions, so it’s crucial to create drainage holes in the bottom of the plastic bottle pot. Use a heated implement such as a hot nail or soldering iron to carefully melt or puncture drainage holes.
- Decorating the Orchid Pot (Optional): Add a personal touch to your DIY orchid pot by decorating it. Consider wrapping the exterior with decorative paper, fabric, or twine. This not only enhances the aesthetic appeal but also provides an additional layer for insulation.
- Transplanting Orchids: Once the DIY orchid pot is prepared, transplant your orchid into its new home. Ensure that the orchid’s roots are accommodated comfortably within the pot, and adjust the potting mix as needed. Water the orchid thoroughly after transplanting.
- Placement and Care: Position the DIY orchid pot in a location that provides the orchid with the required light conditions. Regularly check the moisture level in the potting mix, ensuring that the orchid receives proper hydration without becoming waterlogged.
Benefits of DIY Orchid Pots from Plastic Bottles:
- Cost-Effective Solution: Crafting orchid pots from plastic bottles is a cost-effective alternative to purchasing commercial pots. This DIY approach allows you to allocate your gardening budget to other essentials while still providing a suitable environment for your orchids.
- Customizable Designs: Personalize your orchid pots with unique designs and decorative elements. Whether you prefer a sleek and minimalistic look or a more ornate aesthetic, DIY orchid pots offer the flexibility to express your creativity.
- Sustainable Gardening Practice: Repurposing plastic bottles for orchid pots contributes to sustainable gardening practices by reducing plastic waste. Transforming discarded bottles into functional and attractive containers aligns with an eco-friendly approach to orchid care.
Conclusion:
Crafting DIY orchid pots from plastic bottles not only offers a practical solution for orchid enthusiasts but also adds a touch of creativity to the nurturing process. Embrace this sustainable and budget-friendly approach to orchid care, and watch as your orchids thrive in their uniquely crafted homes, showcasing the beauty of ingenuity in gardening.