Cement Crafting: Unleashing Creativity with DIY Cement Flower Pots
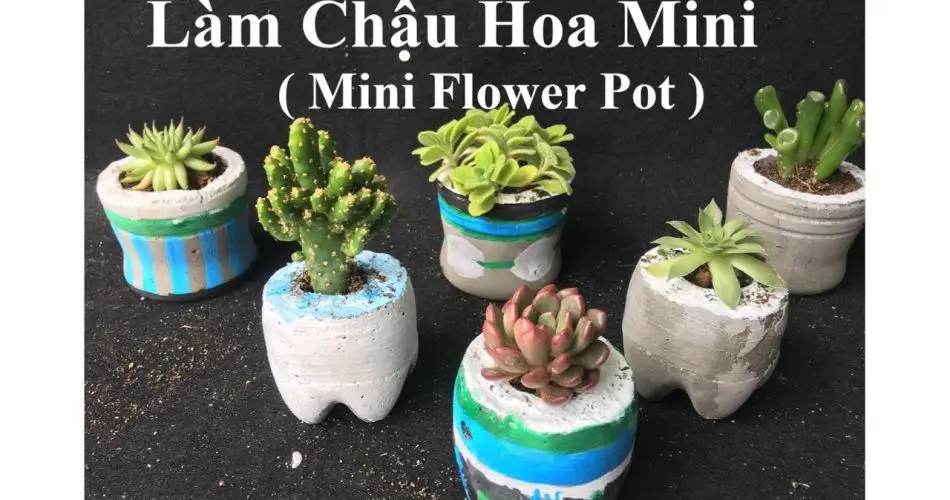
Looking for a unique and durable way to showcase your favorite plants? Look no further than the world of cement crafting. Transforming humble cement into stylish and personalized flower pots is a delightful DIY project that adds a touch of modern elegance to your green spaces. Here’s an exploration of the creative process behind crafting your own cement flower pots.
Materials Needed:
- Cement Mix: Choose a high-quality cement mix suitable for crafting. You can find various types, including quick-setting and standard cement mixes.
- Molds: Select molds in the shape and size you desire for your flower pots. Silicone molds or plastic containers work well for creating unique designs.
- Reinforcement (Optional): For larger or sturdier pots, consider adding reinforcement such as mesh wire or old cloth to the cement mix.
- Release Agent: To facilitate the easy removal of the cement from the molds, use a release agent like cooking spray or silicone-based mold release.
- Mixing Tools: Have mixing tools, such as a bucket and a trowel, for preparing the cement mix.
Step-by-Step Guide:
1. Prepare the Mold:
Apply a thin layer of the release agent to the interior of the mold to prevent the cement from sticking. Ensure the mold is clean and dry.
2. Mix the Cement:
Follow the instructions on the cement mix packaging to prepare a smooth and lump-free mixture. If using reinforcement, incorporate it into the mix.
3. Fill the Mold:
Pour the mixed cement into the prepared mold, ensuring an even distribution. Tap the sides of the mold gently to release any air bubbles.
4. Create Drainage Holes (Optional):
If you plan to use the cement flower pot for outdoor plants, consider adding drainage holes. Insert plastic tubing or any suitable cylindrical object into the cement mix to create holes.
5. Curing Process:
Allow the cement to cure in the mold for the recommended time. This process ensures the cement hardens and gains strength.
6. Demold the Flower Pot:
Once the cement has cured, carefully demold the flower pot. If using flexible silicone molds, gently flex and release the pot. For rigid molds, tap the sides and bottom to loosen the cement.
7. Finishing Touches:
Smooth the edges of the pot using sandpaper or a file. You can also paint or seal the pot for added aesthetics and protection.
Creative Ideas for Cement Flower Pots:
1. Geometric Designs:
Experiment with angular molds to create modern and geometric-shaped flower pots.
2. Embedded Designs:
Add visual interest by embedding decorative items like pebbles, mosaic tiles, or glass shards into the cement.
3. Stacked Planters:
Craft multiple smaller pots and stack them to create tiered planters, offering a dynamic and space-saving garden display.
4. Hollow Center:
Create a unique look by leaving the center of the pot hollow. This design is not only visually appealing but also reduces the weight of the pot.
5. Painted Patterns:
Personalize your cement flower pots by painting patterns, motifs, or even intricate designs. Acrylic paints work well for this purpose.
Crafting flower pots from cement opens up a world of creative possibilities. Whether you’re a seasoned DIY enthusiast or a newcomer to cement crafting, making your own flower pots allows you to infuse your personality into your garden decor. Embrace the versatility of cement and enjoy the satisfaction of seeing your unique creations bloom alongside your favorite plants. Happy crafting!